

How to Install MySQL on Windows
How to Install MySQL & PostgreSQL on Windows: Step-by-Step Guide
When I started learning databases, I understood the basic concepts, but I wanted to actually install a database and try some SQL queries myself.
So today I worked with two popular relational databases: MySQL and PostgreSQL.
In this blog, I’ll show the basic installation process for both on Windows, along with screenshots of the important steps.
Part 1: Installing MySQL
Step 1: Download MySQL
The first step is to download the MySQL Installer for Windows.
The MySQL Installer makes the installation easier because it can install MySQL Server and other useful tools such as MySQL Workbench.

Step 2: Open MySQL Installer
After downloading the installer, open the .msi file.
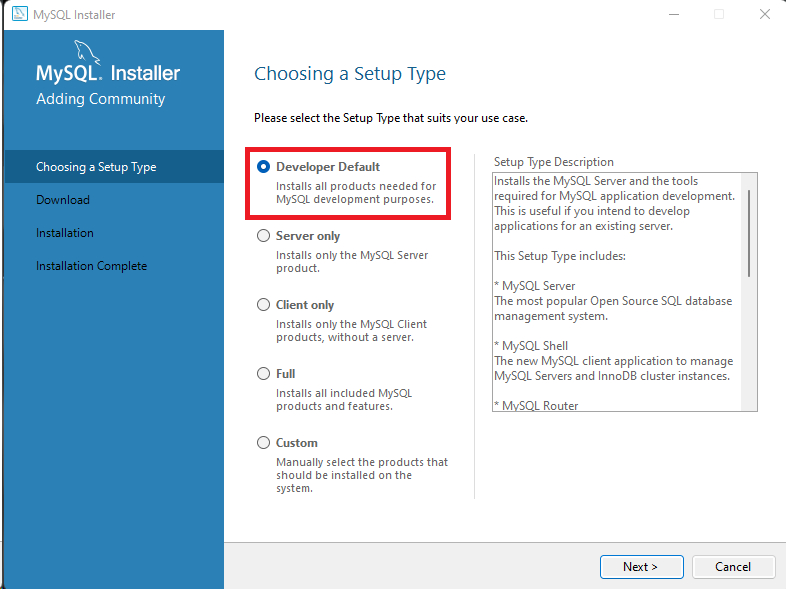
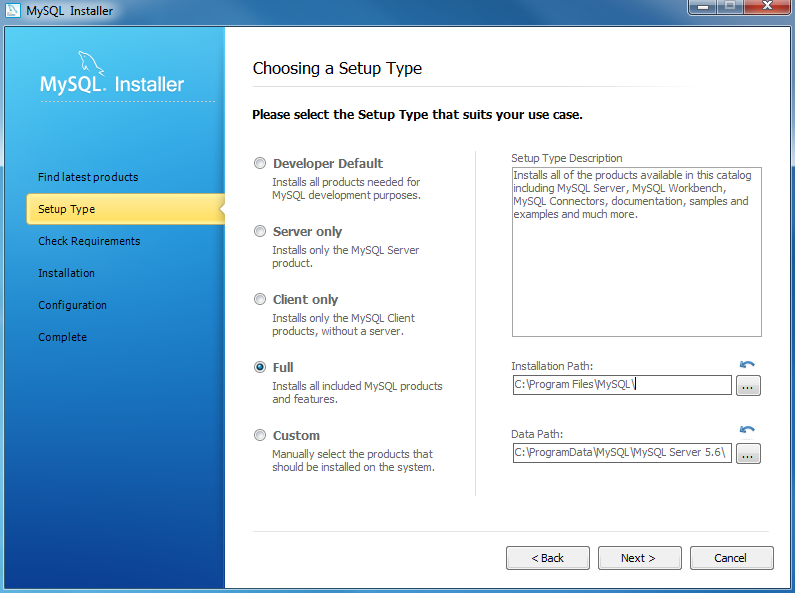
The MySQL Installer will start and show different setup options.
For learning and development, I selected Developer Default because it includes MySQL Server and development tools such as MySQL Workbench.
Step 3: Install MySQL Products
After selecting the setup type, the installer shows the products that will be installed.
Depending on the selected setup, this can include:
- MySQL Server
- MySQL Workbench
- MySQL Shell
- Other MySQL tools
Click Execute to start the installation.
Step 4: Configure MySQL Server
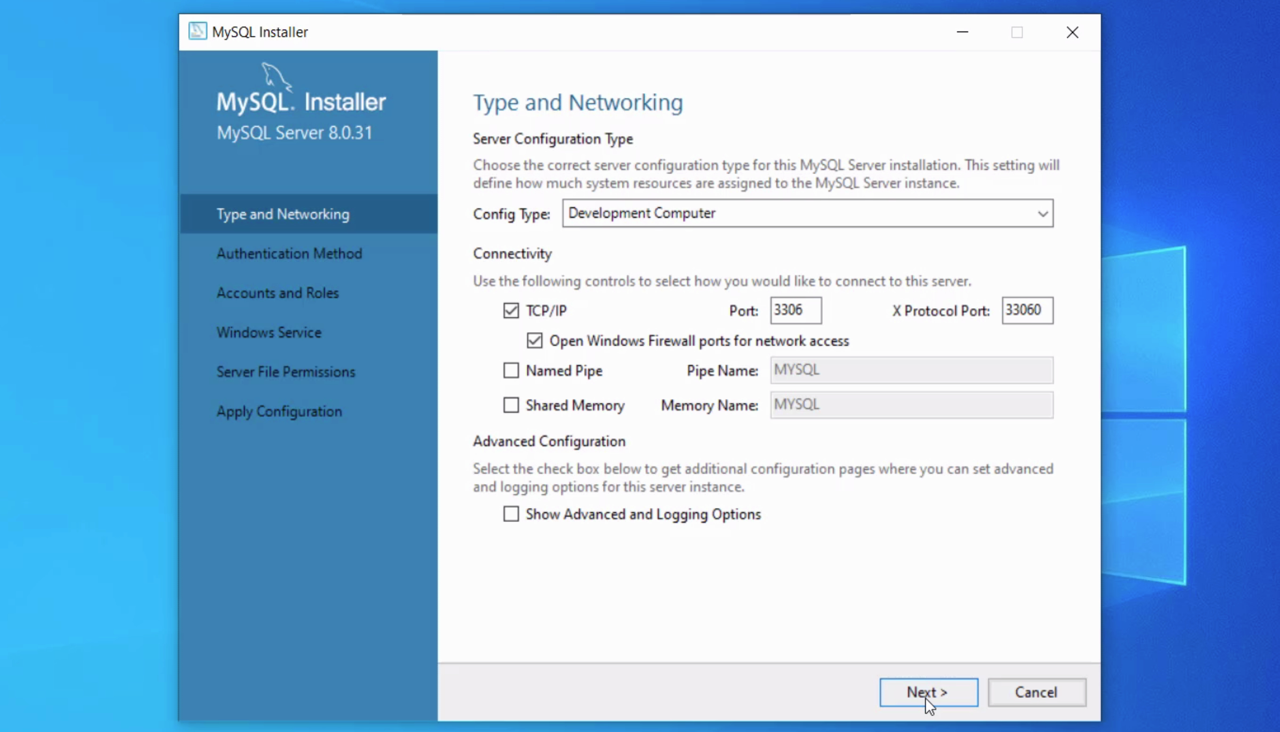
After the products are installed, the installer asks us to configure the MySQL Server.
The installer guides us through the configuration screens.
One important step is setting up the MySQL server and authentication options.
Step 5: Set the MySQL Root Password
Next, we need to create a password for the MySQL root user.
I recommend using a password that you can remember because we will need it when connecting to MySQL later.
Step 6: Open MySQL Workbench
After completing the installation, open MySQL Workbench.
MySQL Workbench provides a graphical interface for working with MySQL databases and SQL queries.

Step 7: Run Your First MySQL Query
Once connected, open the SQL editor and run:
SELECT VERSION();
This query displays the version of MySQL installed on the system.
Part 2: Installing PostgreSQL
Now let's move to PostgreSQL.
PostgreSQL provides an official Windows installer. The installer includes the PostgreSQL server, pgAdmin, and StackBuilder. pgAdmin provides a graphical interface for managing PostgreSQL databases.
Step 1: Download PostgreSQL
First, open the PostgreSQL Windows download page and download the appropriate installer.

Step 2: Start the PostgreSQL Installer
After downloading the installer, open it.
The PostgreSQL setup wizard will appear.
Click Next to continue.

Step 3: Select the Installation Directory
The installer asks where PostgreSQL should be installed.
For a normal installation, I kept the default location.
Click Next to continue.
Step 4: Select Components
The installer allows us to choose the components we want to install.
For a beginner, the important components are:
- PostgreSQL Server
- pgAdmin
- Command Line Tools
The Windows installer officially includes PostgreSQL Server and pgAdmin.
Step 5: Set the PostgreSQL Password
Next, PostgreSQL asks us to create a password for the database superuser.
Enter a password that you can remember.

Step 6: Configure the Port
PostgreSQL also asks for a port number.
For a normal local installation, we can keep the default port unless there is a specific reason to change it.
Step 7: Complete the Installation
Continue through the remaining installation screens.
The installer will install PostgreSQL and the selected components.
Step 8: Open pgAdmin
Now open pgAdmin.
pgAdmin is a graphical tool that allows us to connect to PostgreSQL and manage databases.

Connect to the PostgreSQL server using the password created during installation.
Step 9: Run Your First PostgreSQL Query
Open the Query Tool and run:
SELECT version();
This query displays information about the PostgreSQL version installed on the system.
If the version information appears, PostgreSQL is working correctly.
MySQL and PostgreSQL: What I Noticed
After installing both databases, I noticed that the overall process is quite similar.
Both require us to:
- Install the database server.
- Configure the server.
- Set a password.
- Connect using a database tool.
- Run SQL queries.
The main tools are different:
| MySQL | PostgreSQL |
|---|---|
| MySQL Server | PostgreSQL Server |
| MySQL Workbench | pgAdmin |
| MySQL Installer | PostgreSQL Windows Installer |
| SQL | SQL |
Both are relational databases and both are useful technologies to learn for backend development.
A Few Things to Remember
While installing databases, there are a few things I found important.
Remember Your Password
The password created during installation is required when connecting to the database.
Check the Server
If the database tool cannot connect, first check whether the database server is running.
Check the Connection Details
If you get a connection error, check:
- Host
- Port
- Username
- Password
- Server status
Don't Change Settings Without a Reason
When learning, keeping the default installation settings is usually easier unless you have a specific requirement.
What We Learned
Installing MySQL and PostgreSQL gave me a better understanding of what happens before we start writing database queries.
I also got familiar with MySQL Workbench and pgAdmin, which make it easier to interact with databases using a graphical interface.
The interesting part for me was running my first query after installation. A simple command like:
SELECT VERSION();
was enough to confirm that the database was installed and working.
This hands-on practice made the database concepts I learned in class much easier to understand.
Comments